Blog

  • Master MX Record Setup: Connect Your Domain to Email Provider in Easy Steps!

    Master MX Record Setup: Connect Your Domain to Email Provider in Easy Steps!

    Master MX Record Setup: Connect Your Domain to Email Provider in Easy Steps!

    Setting up MX records is essential for linking your domain to an email provider efficiently. With these simple steps, you can ensure your domain is ready to send and receive emails seamlessly.

    Understanding the Importance of MX Records

    MX records, or Mail Exchange records, play a pivotal role in email delivery. They are responsible for directing email to the correct server based on domain names. In simpler terms, without properly configured MX records, an email sent to your domain might never reach its intended recipient.

    Many sources suggest that accurate MX record configuration is crucial for businesses relying on reliable email communication. Whether you’re running a small business or managing a personal domain, understanding how to set up MX records is indispensable.

    Steps to Set Up MX Records

    To connect your domain to an email provider, it’s important to follow a series of coordinated steps to configure your MX records correctly. Below is a straightforward guide to help you achieve this:

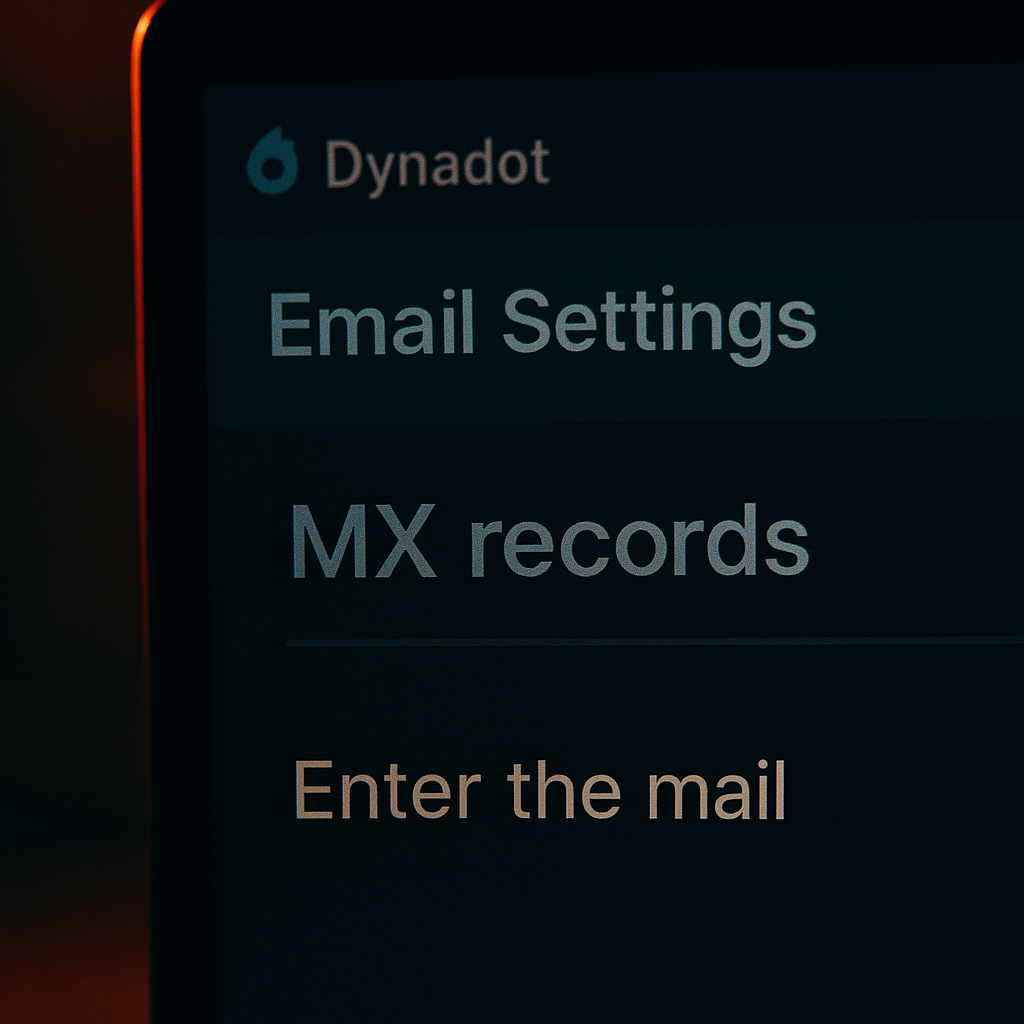
    1. Log into Your Domain Provider: Begin by accessing your Dynadot account or the account of your respective domain registrar.
    2. Navigate to Email Settings: Within your account, seek out the ‘Email Settings’ section. This is where you will adjust the MX records.
    3. Locate the MX Records Section: In the email settings, find the specific section dedicated to MX records. This is where you will input important details.
    4. Enter Mail Server Details: Get the mail server information from your email service provider. Enter these details accurately into the MX records section.
    5. Save Your Changes: Finally, save your changes to update the MX records. This action ensures that your domain is configured to handle emails.

    Troubleshooting Common MX Record Issues

    While setting up MX records is generally straightforward, issues can occasionally arise. It’s commonly believed that one of the most frequent problems is inputting incorrect server details. Always double-check the information provided by your email service provider.

    If you experience ongoing issues, consider reaching out to your domain registrar or email provider for more specific assistance. Many providers offer comprehensive support to address configuration challenges, ensuring that your email setup runs optimally.

    Ensure Smooth Email Operations

    Completing the MX record setup enables seamless email exchanges, fostering effective communication. When your domain is properly connected to an email provider, you’re less likely to encounter delays or delivery failures.

    Remember, regularly reviewing your MX records can help maintain email reliability. Whether refreshing your knowledge or setting up for the first time, understanding this process is advantageous.

    Setting up MX records doesn’t have to be daunting. By following these simple steps, you can ensure your domain communicates effectively with your email provider. If you’re new to this, don’t hesitate to explore further resources or contact support if needed. Start optimizing your email setup today!

  • Transforming Healthcare: Resolvd’s $X Million SaaS Solution Revolutionizes Hospital Supply Chains

    Transforming Healthcare: Resolvd’s $X Million SaaS Solution Revolutionizes Hospital Supply Chains

    How Resolvd is Transforming Healthcare Supply Chains with Innovative SaaS Solutions

    Discover how Resolvd uses cutting-edge technology to revolutionize hospital supply chains, improving efficiency and enhancing patient care while securing significant investments.

    The Genesis of Resolvd’s Groundbreaking Solution

    Resolvd launched with the ambitious mission to tackle inefficiencies in hospital supply chains through technology. At the heart of this endeavor lies the expertise of Ananth Manivannan, whose background in supply chain management and software engineering enabled the creation of a Software as a Service (SaaS) solution specifically designed for healthcare. The innovation addresses critical pain points in hospital supply chains, striving to streamline operations and reduce unnecessary spending.

    Addressing Inefficiencies in Healthcare

    Supply chain challenges within hospitals can have far-reaching impacts on patient care and operational costs. It’s commonly believed that many healthcare facilities struggle with outdated systems that lead to delays, errors, and increased expenses. Resolvd’s SaaS platform aims to transform these processes by leveraging technology to digitize and optimize inventory management, procurement, and logistics. By doing so, hospitals can enhance patient outcomes and reallocate resources more efficiently.

    Capturing Investor Interest

    The innovative approach adopted by Resolvd has not gone unnoticed. Many startups with a solid value proposition and the right technological solutions attract significant investor interest, and Resolvd is no exception. They successfully raised an undisclosed amount of millions in funding, which has enabled them to expand their reach and further develop their offerings. Investors are eager to support solutions that promise to address complex, real-world problems in impactful ways.

    • Improving supply chain transparency.
    • Reducing overhead costs for hospitals.
    • Enhancing patient care through timely access to necessary supplies.
    • Facilitating informed decision-making with data-driven insights.

    The Power of Blending Industry Knowledge with Technology

    The story of Resolvd underscores the immense potential that lies in the intersection of industry expertise and technological innovation. By deeply understanding the specific challenges facing healthcare supply chains, Resolvd was able to craft a solution that not only meets immediate needs but also anticipates future demands. Many experts believe that such integrative approaches are key to solving complex business challenges in today’s rapidly evolving digital landscape.

    Resolvd’s journey from inception to securing substantial investment demonstrates the critical role of innovative thinking in transforming traditional industries. For those interested in the convergence of healthcare and technology, Resolvd offers a compelling example of how strategic innovation can drive significant improvements in efficiency and care standards.

    To stay updated on more inspiring success stories like that of Resolvd’s, explore our playlist on startup software success stories. Join the conversation and see how technological advancements are shaping the future of various industries.

  • Master Complex State in React: Simplify with useReducer for Clean & Scalable Code!

    Master Complex State in React: Simplify with useReducer for Clean & Scalable Code!

    Mastering Complex State in React: Simplifying with useReducer for Clean & Scalable Code

    Tackling complex state management in React can be a daunting task. Learn how the useReducer hook can simplify your code and enhance scalability.

    Understanding the Basics of State Management

    State management is a crucial aspect of building dynamic web applications in React. It’s the mechanism that enables components to manage and react to changing data over time. As applications grow in complexity, managing state can become challenging, especially when dealing with multiple state variables or intricate transitions.

    React provides several mechanisms for managing state, such as the useState hook. While adequate for simple cases, useState can become unwieldy when dealing with more complex scenarios. This is where the useReducer hook comes into play, providing a more structured and scalable approach.

    Introducing the useReducer Hook

    The useReducer hook in React offers a way to manage state transitions more cleanly. It’s a great alternative to useState when you have logic that involves multiple values or when an update to one state depends on the previous state. Here’s a basic breakdown of how useReducer works:

    • Define a reducer function that contains the logic for state transitions based on actions.
    • Initialize your state and connect it to the reducer function using useReducer.
    • Employ the dispatch method to update the state as needed based on specific actions.

    By using useReducer, you separate the management of state logic from the component functions, keeping your code more organized and maintainable.

    Benefits of Using useReducer

    Many developers find that useReducer provides several advantages for managing complex state:

    Cleaner Code: By encapsulating the state transition logic within a reducer function, your components can remain focused on rendering, leading to cleaner and more readable code.

    Scalability: As applications grow, the need for a predictable state management pattern becomes critical. useReducer offers a scalable solution that can easily adapt to the increasing complexity of your application.

    Robustness: With the separation of state logic and UI, useReducer helps make your applications more robust. This separation aids in testing and debugging your code, as the logic is isolated within its own function.

    How to Get Started with useReducer

    To start using useReducer in your React applications, begin by defining a reducer function. This function will take the current state and an action as arguments and return the new state based on that action. Here’s a simple example:

    
    function reducer(state, action) {
        switch (action.type) {
            case 'increment':
                return { count: state.count + 1 };
            case 'decrement':
                return { count: state.count - 1 };
            default:
                return state;
        }
    }


    Next, initialize your state and connect it to your reducer using the useReducer hook:

    
    const [state, dispatch] = useReducer(reducer, { count: 0 });


    Finally, use the dispatch method within your components to update the state based on your desired actions. This setup helps consolidate your state logic and provides a structured approach to state management in React.

    Embrace the power of useReducer and elevate your React development skills. By mastering this pattern, you’ll build applications that are not only efficient but also easier to maintain and scale. Start incorporating useReducer in your projects today!

    If you found this article helpful, consider applying these techniques in your next React project. Subscribe to our JavaScript & React Insights playlist for more tips and tutorials to enhance your coding prowess!

  • Boost PHP App Performance: Switch from CRON Jobs to ZendHQ’s JobQueue for Efficient Task Management!

    Boost PHP App Performance: Switch from CRON Jobs to ZendHQ’s JobQueue for Efficient Task Management!

    Enhance PHP App Performance: Transition from CRON Jobs to ZendHQ’s JobQueue for Efficient Task Management

    Discover a more efficient way to manage background tasks in your PHP applications by switching from traditional CRON jobs to ZendHQ’s JobQueue. This transition can significantly enhance your app’s performance and streamline development.

    Understanding the Limitations of CRON Jobs

    CRON jobs have been a staple in web development for automating tasks such as backups, updates, and sending notifications. However, they come with their own set of limitations. Many developers find CRON jobs to be less than ideal when it comes to managing deferred, recurring, or scheduled tasks. These jobs run based on server time and are not always reliable, especially under high server load or when tasks overlap.

    Another common issue is the lack of monitoring and insight into CRON operation failures. A failed job might silently disrupt your app’s functionality without immediate notice. This unpredictability can be a significant drawback for applications that require consistent and reliable background task execution.

    The Benefits of Using ZendHQ’s JobQueue

    ZendHQ’s JobQueue provides a modern solution to the challenges of traditional CRON jobs. By handling deferred, recurring, and scheduled tasks more efficiently, JobQueue offloads heavy tasks from your web server. This not only optimizes your application’s performance but also simplifies task management within your development framework.

    • Seamless integration with existing frameworks.
    • Improved efficiency in handling background tasks.
    • Enhanced monitoring for job statuses and execution success.
    • Reduction in server load and increased application speed.

    These features enable developers to gain valuable insights into task management, offering a more stable and predictable environment for application operations. The ability to monitor jobs through the ZendHQ dashboard adds an additional layer of assurance, helping you quickly identify and resolve issues.

    How to Get Started with JobQueue

    Integrating ZendHQ’s JobQueue into your PHP application is a straightforward process. Begin by setting up your ZendHQ account and accessing the JobQueue feature through their dashboard. From there, you can configure your application to offload background tasks, allowing you to focus on core development without worrying about the heavy lifting.

    The integration process is designed to be compatible with most PHP frameworks, ensuring that you can enhance your application’s task management without significant restructuring. As you implement JobQueue, monitor the dashboard to observe how these changes improve your application’s operational efficiency.

    Monitoring and Maintaining Efficient Operations

    Once you’ve transitioned to using ZendHQ’s JobQueue, ongoing monitoring becomes crucial. The ZendHQ dashboard provides a comprehensive view of job statuses and performance metrics, making it easy to ensure your application’s tasks run smoothly. Regularly checking these metrics can help you preemptively address any potential issues and maintain consistent performance.

    Furthermore, this proactive approach allows developers to optimize the application’s task scheduling, timing, and execution. By leveraging the insights from the dashboard, you can make informed decisions that enhance your application’s robustness and user experience.

    As you continue to explore the capabilities of ZendHQ’s JobQueue, take advantage of community resources and documentation to refine your implementation. This new approach not only promises to boost performance but also offers peace of mind with efficient and reliable task management.

    Ready to take your PHP application’s performance to the next level? Consider integrating ZendHQ’s JobQueue to streamline your task management process today!

  • Quick Python Tip: Easily Find Max & Min Values in Lists with Built-In Functions!

    Quick Python Tip: Easily Find Max & Min Values in Lists with Built-In Functions!

    Quick Python Tip: Easily Find Max & Min Values in Lists with Built-In Functions

    Discover how to efficiently find the maximum and minimum values in Python lists using the built-in max() and min() functions. This tip simplifies your coding and enhances your programming efficiency.

    Introduction to Python’s max() and min() Functions

    Python is highly regarded for its simplicity and elegance, and its built-in functions like max() and min() exemplify this. These functions allow programmers to easily identify the highest and lowest values in a list or any iterable, such as tuples or sets. This straightforward approach not only makes your code cleaner but also improves its efficiency.

    For those new to Python or experienced developers looking for quick ways to streamline their code, utilizing these functions is a quick win. Let’s explore how you can apply them to your projects.

    Using max() and min() with Lists

    Lists are a fundamental data structure in Python, widely used due to their versatility. Whether handling a list of numbers, strings, or other objects, finding the maximum or minimum value typically involves sorting or looping through the list. However, Python offers a more direct solution.

    • max(my_list) returns the highest value from my_list.
    • min(my_list) returns the lowest value from my_list.

    These functions can be applied like this:

    my_list = [3, 1, 4, 1, 5, 9, 2, 6, 5]
    max_value = max(my_list)
    min_value = min(my_list)
    print(f"Max: {max_value}, Min: {min_value}")
    

    When executed, this code snippet will output the maximum and minimum values within the list, demonstrating the ease and efficiency of these functions.

    Beyond Lists: Versatile Applications

    While lists are perhaps the most common use case, it’s important to note that both max() and min() work on any Python iterable. This includes tuples, sets, and even strings, providing a significant amount of flexibility with just a small set of functions.

    For example, if you’re working with a set:

    my_set = {8, 3, 5, 2, 7}
    print(max(my_set))  # Outputs: 8
    print(min(my_set))  # Outputs: 2
    

    This adaptability makes them a valuable component of your Python toolkit, allowing you to handle a diverse range of data types with minimal changes to your code.

    Conclusion

    Embrace the simplicity and power of Python by utilizing max() and min() to find values in collections effortlessly. These functions enhance your capability to write clean, efficient, and adaptable code across various projects. Implementing them not only saves time but also aligns with Python’s philosophy of simplicity and readability.

    Why not give these functions a try in your next Python project? Experimenting with them will enhance your coding skills and demonstrate Python’s capabilities. Start using max() and min() today and experience the ease they bring to your development process.

  • “Boost Your Coding Efficiency: Harness AI Tools Like ChatGPT for Faster, Safer Development!”

    “Boost Your Coding Efficiency: Harness AI Tools Like ChatGPT for Faster, Safer Development!”

    Boost Your Coding Efficiency: Harness AI Tools Like ChatGPT for Faster, Safer Development

    AI tools like ChatGPT are revolutionizing the way developers approach coding, enhancing both speed and security. Leveraging these tools can streamline development processes and ensure a more robust end product.

    The Evolution of Development Practices

    Over the years, software development has undergone significant transformation. Traditional coding methods required extensive manual effort and time, often leading to bottlenecks and creative blocks. With the advent of AI, however, this landscape is changing rapidly. AI-powered tools, such as ChatGPT, are at the forefront, helping to redefine how developers conceptualize and execute their projects.

    Enhancing Efficiency with AI Tools

    Imagine a world where coding efficiency is greatly enhanced by AI-backed superpowers. AI tools allow developers to quickly brainstorm ideas and translate them into code, simply by articulating their needs in natural language. This helps in overcoming creative obstacles, thereby speeding up the development process. Many sources suggest that developers can generate code snippets or even complete functions more quickly using tools like ChatGPT.

    • Streamline brainstorming sessions
    • Automate repetitive coding tasks
    • Produce more robust code with less manual effort

    Achieving Safer Development

    In addition to increased efficiency, AI tools significantly contribute to safer development. By using AI-driven security tools, developers can automatically scan their code for vulnerabilities. This proactive approach ensures that potential security issues are identified and resolved early in the development cycle. It’s commonly believed that such AI integrations lead to a more secure and reliable product.

    Embracing the Future of Development

    As the tech landscape continues to evolve at an unprecedented pace, staying ahead requires embracing AI advancements. By integrating AI tools into development workflows, developers can not only increase their coding efficiency but also ensure a higher standard of code safety. The future of development is promising and filled with opportunities for those ready to innovate and adapt.

    To keep pace with technological advancements and remain competitive in the field, consider exploring various AI tools that can enhance your coding practice. Empower your development process with AI today and experience a new level of productivity.

  • “Set Up Your Online Academy: WordPress & LearnDash Easy Guide!”

    “Set Up Your Online Academy: WordPress & LearnDash Easy Guide!”

    How to Set Up Your Online Academy with WordPress and LearnDash: An Easy Guide

    Setting up an online academy is simpler than ever with WordPress and LearnDash. Follow these steps to create, manage, and monetize your educational platform efficiently.

    Step 1: Install LearnDash for Efficient Course Management

    To kick off your online academy, you’ll need a powerful tool to manage your courses. LearnDash is a highly recommended WordPress plugin that many experts favor for its efficiency and comprehensive features. By installing this plugin, you can easily create and organize courses, set prerequisites, track student progress, and award certificates upon completion. This robust tool is known for its user-friendly interface that requires minimal technical expertise to operate, making it a perfect fit for educators on any level.

    Getting started with LearnDash usually involves purchasing the plugin, downloading it, and then uploading it to your WordPress site through the plugins section. With many online resources available, integrating LearnDash into your WordPress site can be both straightforward and rewarding.

    Step 2: Foster Community Interaction with BuddyPress

    Building a sense of community among your students can significantly enhance their learning experience. BuddyPress, another popular WordPress plugin, allows you to create forums, profiles, groups, and private messaging systems. By adding BuddyPress to your site, students can engage with each other, join discussion groups, and collaborate on projects.

    The installation process for BuddyPress is similar to other WordPress plugins. Many features can be enabled or disabled based on your academy’s needs, providing flexibility to scale your community features as your academy grows. With BuddyPress, you’ll create an interactive, supportive environment that keeps students engaged and motivated.

    Step 3: Customize Your WordPress Theme

    The look and feel of your website can influence how visitors perceive your academy. A well-chosen WordPress theme ensures your site is visually appealing and easy to navigate. Many theme options are available that cater specifically to educational sites, offering features like integrated course pages, lesson plans, and student profiles.

    • Choose a responsive theme: Ensure your website looks great on all devices.
    • Optimize for speed: Faster loading times improve user experience.
    • Consider accessibility: Make your site accessible to all users, including those with disabilities.

    Take the time to customize your chosen theme to align with your brand’s identity, so your academy stands out and appeals to your target audience.

    Step 4: Monetize Your Courses with WooCommerce

    Once your courses are ready, the next step is to monetize them efficiently. WooCommerce is one of the leading e-commerce solutions in the WordPress ecosystem. By integrating WooCommerce with LearnDash, you can sell your courses, manage student enrollments, and handle payments directly on your site.

    WooCommerce integration with LearnDash is typically seamless, offering options for one-time purchases or subscription-based models. You’ll also find various payment gateways, such as PayPal or Stripe, which can be configured to process transactions securely and efficiently.

    In conclusion, setting up an online academy with WordPress, LearnDash, BuddyPress, and WooCommerce provides a comprehensive platform for delivering educational content effectively. This combination of tools offers educators the power to create immersive learning experiences while facilitating community interaction and monetizing expertise.

    If you’re eager to start building your online academy, take the first step by exploring these plugins to see how they can work for you. Keep learning, experimenting, and innovating to make your academy a success story in the digital landscape.

  • Automate Your Marketing with Zapier: Boost CRM & Email Campaign Efficiency!

    Automate Your Marketing with Zapier: Boost CRM & Email Campaign Efficiency!

    Automate Your Marketing with Zapier: Enhance CRM and Email Campaign Efficiency

    Discover how automating your marketing processes with Zapier can elevate your CRM and email campaign effectiveness, saving you time and boosting your marketing impact.

    Why Automation Matters in Marketing

    In the fast-paced world of digital marketing, efficiency is key. Automating repetitive tasks can free up your time and resources, allowing you to focus on strategic decision-making. Many sources suggest that businesses leveraging automation tools experience enhanced customer engagement and improved conversion rates. By automating processes with tools like Zapier, you can streamline your marketing efforts and achieve better results without increasing your workload.

    Integrating Zapier with CRM and Email Campaigns

    Zapier allows you to seamlessly connect your Customer Relationship Management (CRM) system with your email marketing platform. This integration opens up a world of possibilities for automating your marketing operations. For instance, you can automatically segment your audience within your CRM according to their interactions and preferences, ensuring that your emails are targeted and relevant.

    Moreover, automated follow-ups become a breeze with Zapier. Once a lead shows interest but doesn’t convert immediately, Zapier can trigger a series of personalized follow-up emails designed to nurture the prospect through the sales funnel. This level of automation ensures no potential customer falls through the cracks, increasing your chances of closing deals significantly.

    Steps to Automate with Zapier

    Setting up automation with Zapier is straightforward and can be done without any coding knowledge. Here’s a simple guide:

    1. Identify the tasks you want to automate, such as lead follow-ups or email segmentation.
    2. Choose the apps (CRM, Email marketing platforms) you wish to connect.
    3. Create a ‘Zap’, which is a workflow that dictates how the apps will interact and automate your chosen tasks.
    4. Test the ‘Zap’ to ensure everything works as intended, and make any necessary adjustments.
    5. Activate your ‘Zap’ and monitor its performance to optimize your marketing efficiency.

    Benefits of Using Zapier for Marketing Automation

    Automating your marketing efforts with Zapier can lead to substantial benefits for your business. These include more efficient use of time, as repetitive tasks are handled automatically, allowing your team to focus on more strategic initiatives. Furthermore, as personalization is crucial in marketing, automated segmentation ensures that your communication with clients is relevant and timely, increasing engagement and conversion rates.

    Additionally, with automated follow-ups, you can ensure continuous engagement with potential leads without manual intervention. This consistency boosts your opportunities to convert interested prospects into loyal customers, thereby enhancing your overall marketing impact and achieving better results.

    Ready to take your marketing to the next level? By incorporating Zapier into your marketing strategy, you can enhance efficiency and effectiveness, ultimately driving growth for your business. Begin your automation journey today and experience the benefits firsthand.

  • “Revolutionize Coding with AI: Boost Efficiency, Creativity & Security in Tech!”

    “Revolutionize Coding with AI: Boost Efficiency, Creativity & Security in Tech!”

    Revolutionize Coding with AI: Boost Efficiency, Creativity, and Security in Tech

    Discover how AI tools are transforming the coding landscape by enhancing efficiency, creativity, and security. Stay ahead in the tech world by leveraging these advancements.

    AI Enhancing Coding Efficiency

    In the fast-evolving tech industry, efficiency is paramount. AI tools like ChatGPT have emerged as powerful allies for developers, offering a radical improvement in coding efficiency. These tools can automate repetitive tasks, allowing developers to focus on more complex aspects of their projects. Imagine typing just a simple description and receiving ready-made code snippets or even entire functions. This ability significantly cuts down development time, enabling quicker project turnarounds.

    Moreover, AI can help manage large codebases by suggesting optimizations that developers might overlook. By continuously scanning code and offering instant feedback, AI supports cleaner and more efficient coding practices. The impact on efficiency is unmistakable, making AI tools indispensable in modern software development.

    Unleashing Creativity with AI

    Creativity in coding is not just about writing elegant code; it’s about solving problems in innovative ways. AI tools assist in breaking through creative blocks by providing new perspectives and solutions. When developers are stuck, AI can propose unconventional approaches or variations of their initial ideas, fostering creativity and innovation.

    Furthermore, AI-written code can inspire developers to experiment with different programming paradigms or languages. By presenting alternative solutions, AI encourages experimentation and learning, enhancing a developer’s creative toolkit.

    Strengthening Security with AI

    Security is a critical aspect of software development. AI-driven security tools are increasingly important as they offer a proactive approach to safeguarding code. These tools can automatically scan code for known vulnerabilities and suggest patches, thus reducing the risk of exploitation.

    Some AI tools go a step further, identifying potential security threats that human developers might miss. By incorporating AI into the software development lifecycle, teams can maintain a strong security posture, protecting both their projects and users’ data.

    • Automate repetitive coding tasks
    • Generate code snippets from descriptions
    • Suggest optimizations and improvements
    • Identify and patch security vulnerabilities

    Embrace the Future of Coding with AI

    The benefits of integrating AI in software development are clear. From boosting efficiency and sparking creativity to enhancing security, AI is transforming the tech industry. Many sources suggest that developers who embrace AI tools are more likely to stay competitive in the ever-evolving tech world.

    If you’re a developer or a tech enthusiast, consider exploring AI-powered solutions to elevate your coding practices. Embracing these advancements today can give you a significant edge, preparing you for the challenges of tomorrow’s tech landscape.

    Take the leap into the future of programming. Start exploring AI-driven coding tools and experience a new era of software development.

  • “Turn AI Skills into a Product: Identify Problems, Build MVPs, and Launch Your Platform!”

    “Turn AI Skills into a Product: Identify Problems, Build MVPs, and Launch Your Platform!”

    Transform Your AI Skills into a Product: Identify Issues, Build MVPs, and Launch Successfully!

    Turn your AI expertise into a tangible product by identifying problems, building a minimum viable product (MVP), and launching your platform using strategic methods.

    Recognizing the Problem Your AI Solution Can Solve

    The first step in turning your AI skills into a product is to identify the specific problem your solution can address. Many experts suggest that successful products often stem from resolving a common issue faced by the target audience. Consider the various areas where AI excels, such as data analysis, automation, and pattern recognition. These capabilities can be instrumental in developing solutions that offer significant value to businesses or consumers. Make sure the problem is well-defined and your AI solution offers a unique or improved approach compared to existing alternatives.

    Using Prompt-Led Development to Build Your MVP

    Once you have identified a problem, the next phase is to develop a minimum viable product (MVP). The MVP allows you to deliver a basic version of your product with just enough features to attract early adopters and start the feedback loop. Employing Prompt-Led Development is an effective way to draft the core functionalities of your product. This process involves using prompts to clarify your product’s objectives, customer interactions, and key features, ensuring you stay focused on the essentials without getting bogged down by unnecessary details.

    No-code tools such as Bubble or Adalo can be invaluable in this stage, as they allow you to create prototypes swiftly without extensive programming knowledge. These platforms offer drag-and-drop interfaces, making it easier to visualize your concept and iterate quickly based on the insights gathered from initial user feedback.

    Launching and Refining Your Product

    After your MVP is developed, the next critical step is to launch it and gather feedback from early users. This feedback is vital in refining and improving your product. Engaging with early adopters allows you to understand their needs, preferences, and any hurdles they encounter while using your product. Be ready to iterate rapidly using this input; flexibility is key in the early stages of product development.

    • Gather honest feedback from early users
    • Identify areas for improvement and make necessary changes
    • Stay flexible and adaptive to user needs

    Promoting Your Platform to Reach Your Audience

    Promotion is an essential component of launching your AI-based platform. Utilize social media and online communities to spread the word about your product. According to many marketing experts, these channels offer a cost-effective way to reach a large audience and foster engagement. Creating a consistent presence on platforms like LinkedIn, Twitter, or niche forums can help establish your authority and build a community around your product.

    Additionally, participating in discussions, providing valuable insights, and offering exclusive content related to your product can further enhance visibility and credibility. This approach not only helps in promoting your product but also in establishing long-term relationships with potential clients and users.

    Ready to take the plunge and turn your AI skills into a successful product? By identifying the right problem, building a solid MVP, and engaging your audience strategically, you can launch a platform that resonates well with users. Start leveraging your expertise today and watch your AI creation come to life!